Installing a Cube Sauna: Electrical, Foundation, and Clearances for Beginners
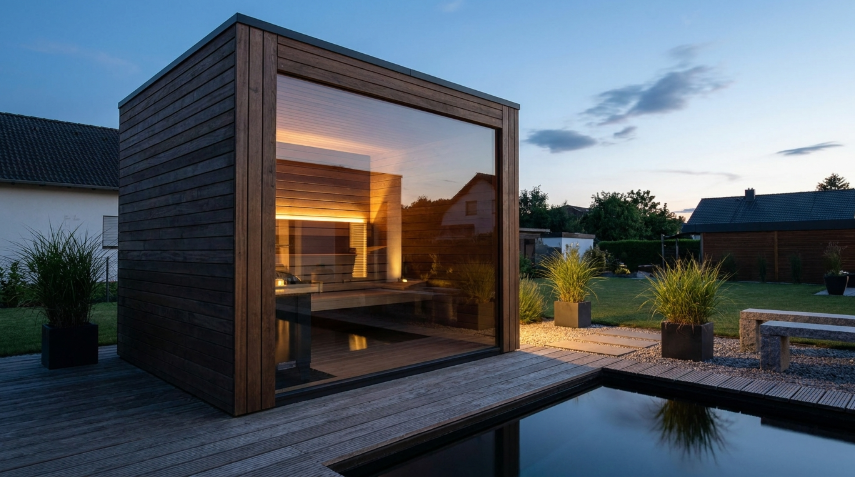
Installing a cube sauna comes down to three things beyond the assembly itself: a dedicated 240-volt circuit sized to the heater, a level and well-drained foundation rated for the unit’s weight, and code-compliant clearance from property lines and structures. Missing any one of these turns a straightforward weekend project into a stalled one. Here is the installation broken into the steps that actually matter, in the order they typically come up.
1. Confirm Heater Kilowatt Rating Before Anything Else
Every other installation decision flows from this number. A six-person cube sauna with over seven feet of interior headroom generally needs an 8 kilowatt or larger electric heater, sized to cubic footage rather than floor area. Confirm the manufacturer’s minimum heater requirement before ordering electrical work, since the circuit size an electrician plans depends entirely on the heater’s rated draw.
2. Get an Electrical Quote Before the Sauna Ships
Most homes do not already have a spare 240-volt circuit sized for an 8 kilowatt-plus load sitting near the intended install site. A licensed electrician needs to run a new circuit from the panel, which involves distance from the panel, whether the panel has an open breaker slot, and local permit requirements. Getting this quoted and scheduled before the sauna arrives avoids having a fully assembled cabin sitting unusable in the yard for weeks.
3. Choose a Foundation Rated for the Weight
A six-person cube sauna can weigh around 2,000 pounds once fully assembled. That load needs a level, well-drained surface: a reinforced deck built to carry that weight, a poured concrete pad, or compacted gravel with pavers. An existing wood deck not originally built for this kind of concentrated load may need additional joists or blocking underneath before it is safe to use, which is worth having a contractor confirm rather than assuming.
4. Check Drainage at the Site Before Committing
Standing water at the base of a cube sauna accelerates wood breakdown regardless of species, so the install site needs to shed water away from the structure rather than pool underneath it. A slight grade away from the sauna, combined with gravel or a paver base that allows water to drain through rather than sit, solves this for most residential sites. Low spots in the yard that collect water after rain are worth avoiding entirely, even if they otherwise look convenient.
5. Verify Setback and Clearance Requirements
Local building and fire code typically sets minimum clearance from property lines, fences, and combustible structures once an electric heater is part of the installation, and these requirements vary significantly by city and county. Some jurisdictions also require a disconnect switch installed within sight of the heater. Calling the local building department before finalizing placement, rather than after the pad is poured, is the cheapest way to avoid having to relocate a finished installation.
6. Plan Access for a Roughly 2,000-Pound Crate
Cube saunas ship via freight, typically with curbside delivery, meaning the crate is dropped at the end of the driveway rather than carried to the backyard. Moving a heavy crated unit from the curb to the install site requires either several people, an appliance dolly rated for the weight, or equipment rental, depending on the distance and terrain involved. Planning this logistics step before delivery day, rather than scrambling once the freight truck arrives, keeps the project on schedule.
7. Assemble the Structure Following the Panel Sequence
Units engineered for one-day DIY assembly ship as pre-cut panel kits designed to go together in a specific order, typically floor, walls, then roof, with the glass front panel installed carefully to avoid stressing the seal. Two capable people with basic tools, a few hours, and a level surface can generally complete this in a single day. Rushing panel alignment early in the sequence is the most common cause of gaps that show up later as drafts or uneven door swing.
8. Final Electrical Hookup and Inspection
Once the structure is assembled and the heater is in place, the licensed electrician completes the final circuit connection and, in most jurisdictions, the work gets a permit inspection before the sauna is considered code-compliant. Skipping this step is not just a code violation risk; it also means the installation was never verified for basic electrical safety on a device that runs hot for extended periods.
9. Compare Options Before You Finalize the Model
Before locking in a specific cube sauna model, it is worth taking the time to check what is in stock across a few specialty retailers, since interior dimensions, wood species, and heater compatibility all vary between otherwise similar-looking cube models. A model that looks nearly identical in photos can require a meaningfully different heater size or foundation footprint once the actual specifications are compared.
10. Check Roof Seams and Exterior Joints After Assembly
Once the panels are up, go over the roofline and every exterior seam before considering the install finished. Roof panels on a cube sauna need a tight, consistent seal along every joint, since the exterior takes direct rain and snow exposure that the interior never sees. A gap along a roof seam that looks minor on install day can let water track into the wall cavity over a full season of weather, showing up months later as a soft spot or dark staining that is far harder to fix than tightening a joint would have been at assembly time. This is a five-minute check that is easy to skip once the structure looks finished, but it is worth doing before the first hard rain.
11. Size the Pad to the Exterior Footprint, Not the Interior
A mistake beginners make when pouring a pad or laying gravel and pavers is measuring against the interior dimensions instead of the larger exterior footprint. Wall thickness on a well-built cube sauna adds several inches per side once insulation and panel thickness are accounted for, so a pad sized to interior measurements alone ends up too small once the actual structure arrives. Measure against the manufacturer’s stated exterior dimensions, then add clearance on top of that for the code-required setbacks discussed above, before pouring or laying anything permanent.
What the Health Research Says, and Why It Doesn’t Change the Install Steps
Reviews in Mayo Clinic Proceedings and Evidence-Based Complementary and Alternative Medicine have both summarized associations between regular sauna bathing and favorable cardiovascular outcomes in Finnish cohort data, alongside a 2023 review examining whether combining sauna use with other lifestyle habits adds further benefit. These are associations, not guarantees for any one household, and none of them change the underlying installation requirements above. A cube sauna installed without proper electrical work or a stable foundation carries real safety risk regardless of what the research on regular use suggests about long-term benefit.
Frequently Asked Questions
Do I need a dedicated circuit for a cube sauna heater? Almost always. Heaters rated 8 kilowatts or higher generally require a dedicated 240-volt circuit from a licensed electrician.
What kind of foundation does a cube sauna need? A level, well-drained, weight-rated surface: a reinforced deck, concrete pad, or gravel with pavers.
How much clearance does a cube sauna need from a fence or structure? Set by local code and varies by jurisdiction. Check with the local building department before placement.
Can I install a cube sauna myself? The structure itself, yes, with basic tools. The electrical circuit should be handled or inspected by a licensed electrician.
References
- Cardiovascular and Other Health Benefits of Sauna Bathing: A Review of the Evidence, Mayo Clinic Proceedings, 2018
- Clinical Effects of Regular Dry Sauna Bathing: A Systematic Review, Evidence-Based Complementary and Alternative Medicine, 2018
- Does the Combination of Finnish Sauna Bathing and Other Lifestyle Factors Confer Additional Health Benefits? A Review of the Evidence, Mayo Clinic Proceedings, 2023
By Sara Delgado